Create your own VPC and launch a sample website.
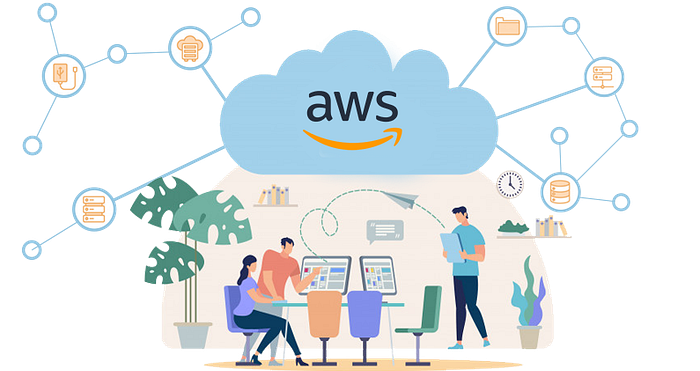
Here you can able to create your own vpc, subnets, route tables, internet gateway, and launch your sample website with our own VPC.
What is VPC?
Amazon VPC is known as Amazon Virtual Private Cloud (VPC), allowing you to control your virtual private cloud. Using this service, you can design your VPC right from resource placement and connectivity to security. And you can add Amazon EC2 instances and Amazon Relational Database Service (RDS) instances according to your needs. Also, you can define the communication between other VPCs, regions, and availability zones in the cloud.
What is EC2?
Amazon EC2 is known as Amazon Elastic Cloud Computing Platform. It provides a robust computing platform to handle any workload with the latest processors, storage, Operating Systems, and networking capabilities. It simplifies the computing process for developers. And this service reduces time by allowing quick scaling as per the requirements.
What is CIDR?
CIDR stands for Classless Inter-Domain Routes
A subnet CIDR reservation is a range of IPv4 or IPv6 addresses in a subnet. When you create the reservation, you specify how you will use the reserved range.
Base IP 10.0.0.0/16
/32, /24, /16, /8, /0 are the subnet masks
/32 → No IP Change (you will get only one IP)
/24 → Last value in IP will change (xx.xx.xx.(xx)/24)
/16→ Last 2 values in IP will change (xx.xx.(xx.xx)/16)
/8 → Last 3 values in IP will change (xx.(xx.xx.xx)/8)
/0 → All IP values will change (/0 is an internet)
Get started
Let’s create our own VPC
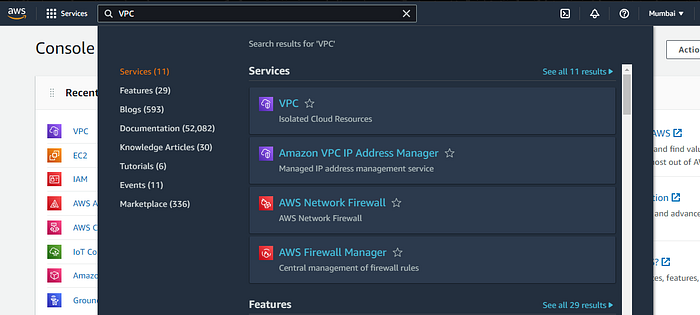
Search for VPC on the search bar and click on VPC
Now on the left menu click on Your VPC and you will see the default vpc which is created for you.
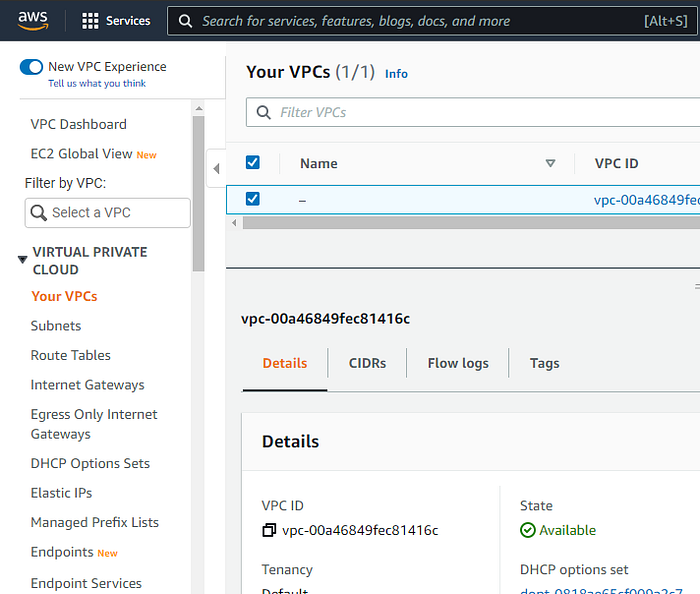
Now click on create VPC

Name your VPC and under IPv4 CIDR, enter the IP on which your VPC should run with your subnet-Mask
Let's enter the value as 10.0.0.0/16
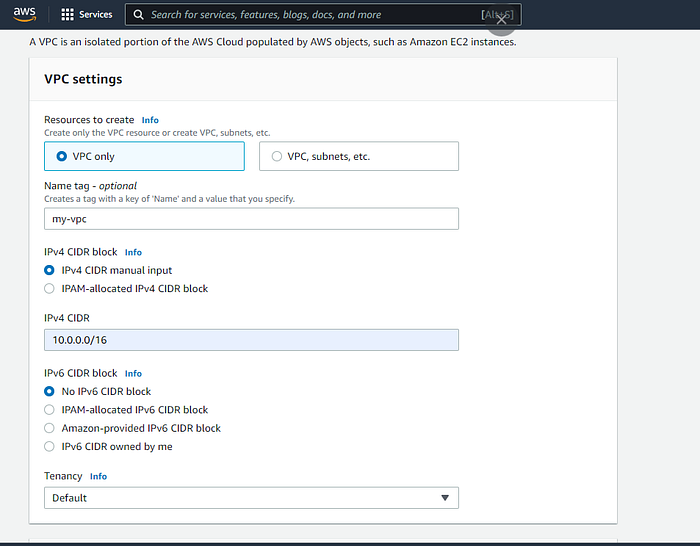
Now click on create VPC
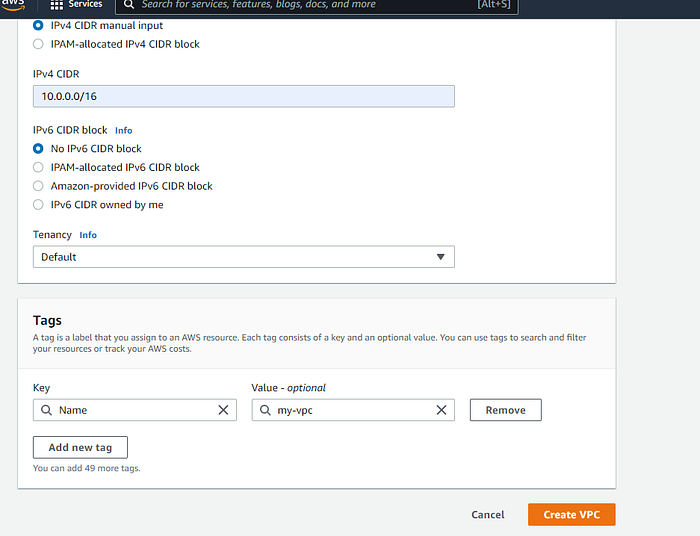
Now you can see that you just created your own VPC now, we need to create subnets and network gateway for our VPC.

That’s it you just created your VPC
Let’s create subnets for our VPC
Now on the left menu click on subnets.

You will see that there are a few default subnets created based on location.
Now click on create a subnet and select the VPC you just created
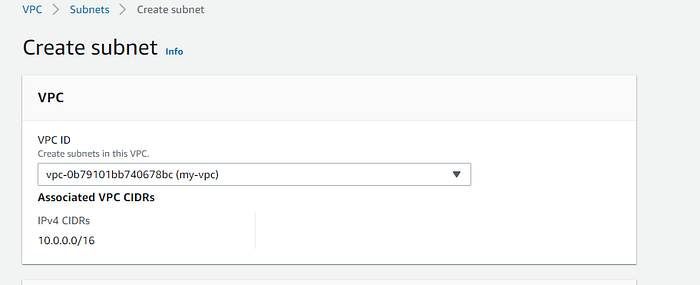
Now name your subnet and select Availability Zone.
Now under the IPv4 CIDR block enter the CIDR value as 10.0.1.0/24
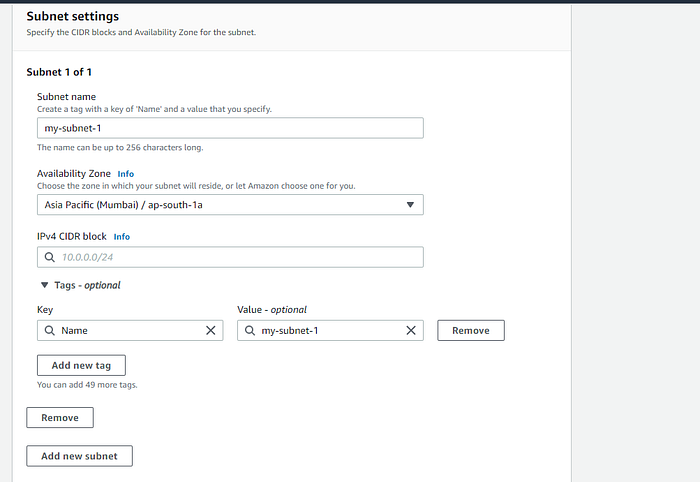
Now click on create a subnet and done
Now create another subnet with a different availability zone and CIDR value with 10.0.2.0/24
After creating two subnets you will see this:

That’s it you just created subnets for your VPC
Let’s create Route tables for our VPC
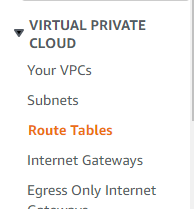
Now on the left menu click on the route table.
Click on create route table. enter the name for your route table and select your VPC.
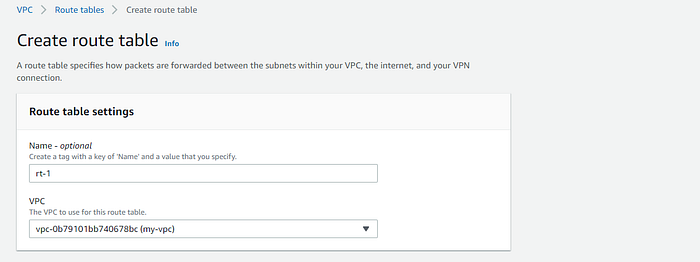
Now click on create route table at the bottom. Now will see the page like this:
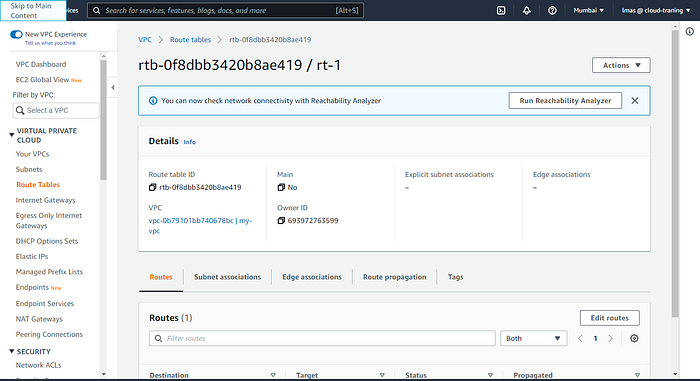
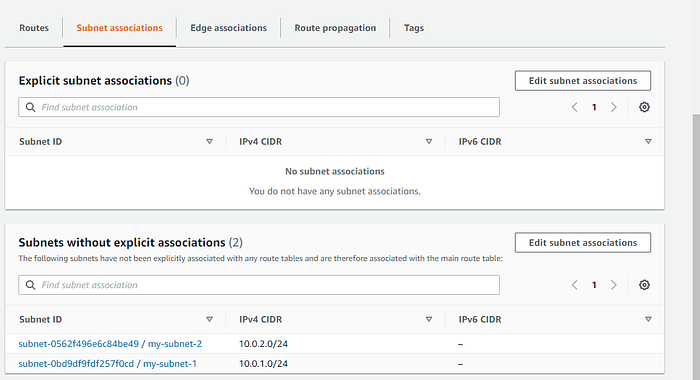
Now at the bottom click on subnet associations, under Explicit subnet associations click on edit subnet associations
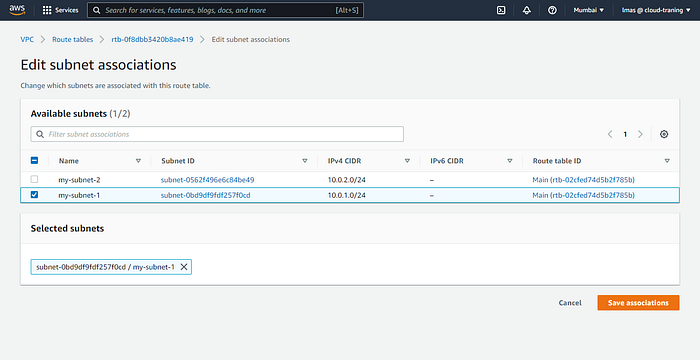
Now select your first subnet and click on save association.
Now select your first route table and under routes click on edit routes
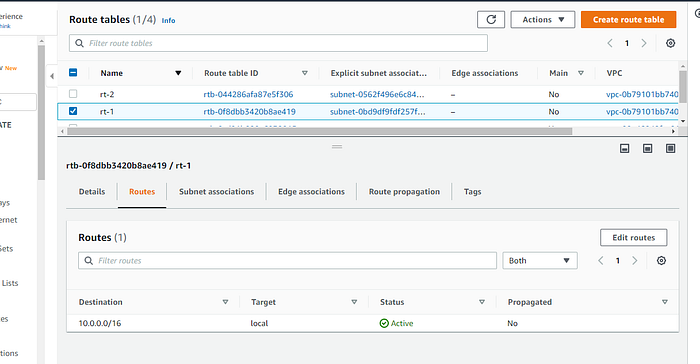
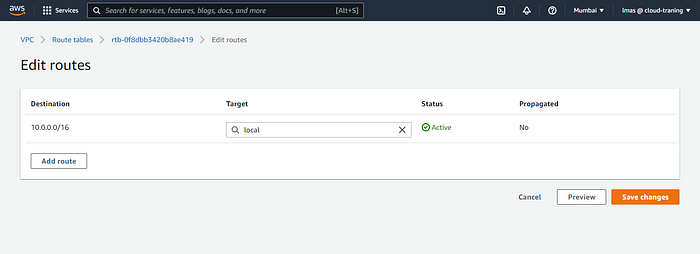
Now click on Add route. Under Destination select 0.0.0.0/0 destination and under target select Internet gateway and select your gateway. Click on Save changes.

Now follow the above process to create a new route table and in edit subnet associations select your second subnet.
That’s it you just created route tables for your VPC which is associated to your subnets.
Let’s create Internet gateway for our VPC
Now on the left menu click on Internet Gateways

Click on create internet gateway. Name your gateway and click on create internet gateway.
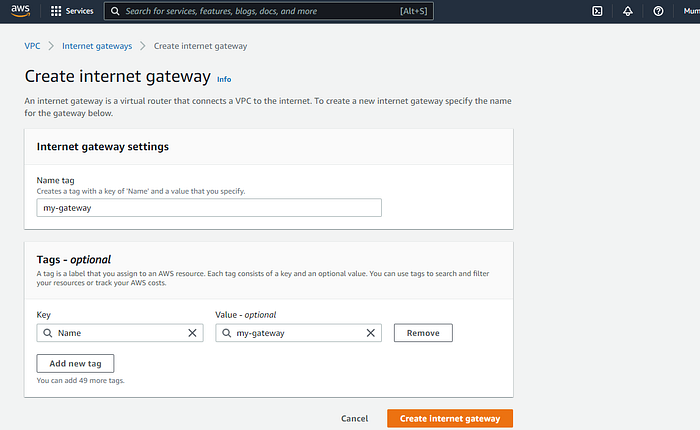
Now we need to attach this gateway with our VPC.
Select your gateway and click on actions and click on attach VPC.

Now select your VPC and click on attach internet gateway.
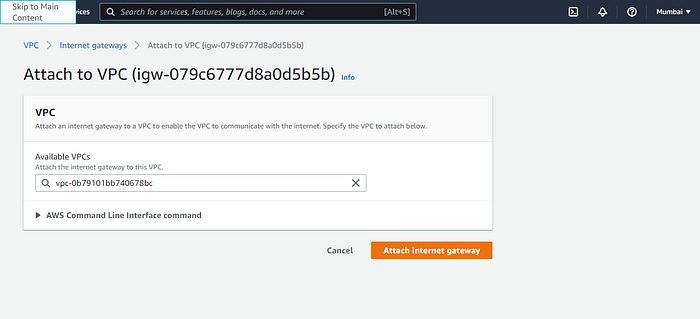
That’s it you just created an Internet gateway for your VPC.
Let’s launch Ec2 instance on your own VPC
Now search for EC2 in the search bar
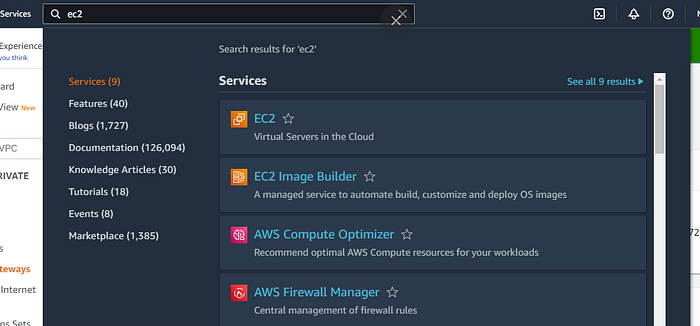
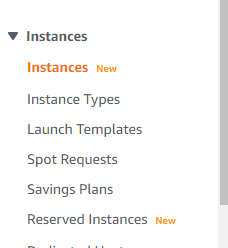
on the left menu click on instances and create a new instance
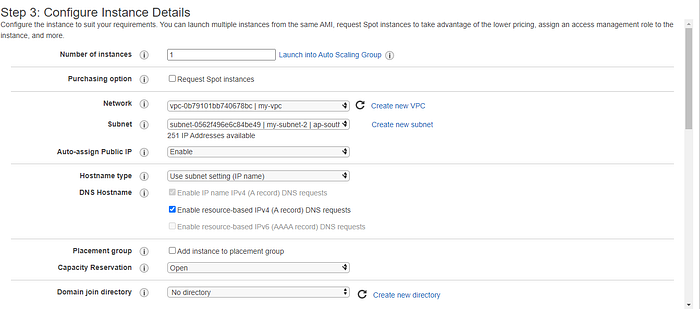
while creating under Configure Instance Details, select your VPC and your subnets. Enable the Auto-assign Public IP.
You should ensure that under security groups you need to add HTTP with port 80.

and launch instance
That’s it you just launched the EC2 instance with your own VPC.
Let’s launch the sample website on your instance
On your Ec2 dashboard select your instance and click on connect

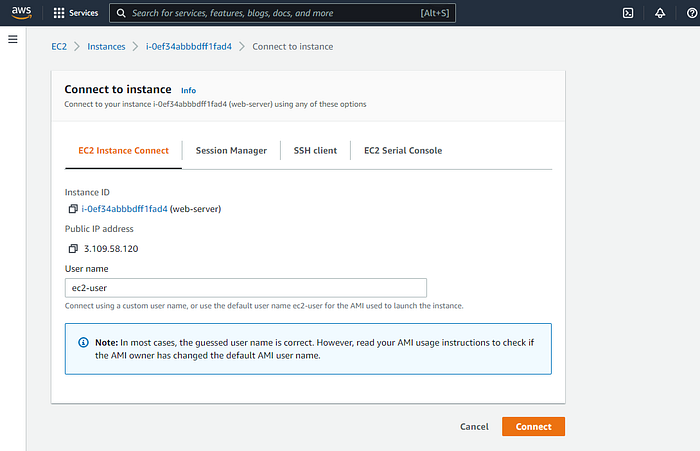
You can select EC2 instance connect on SSH client. For this, I am using EC2 Instance connect. Click on Connect and you will see like:
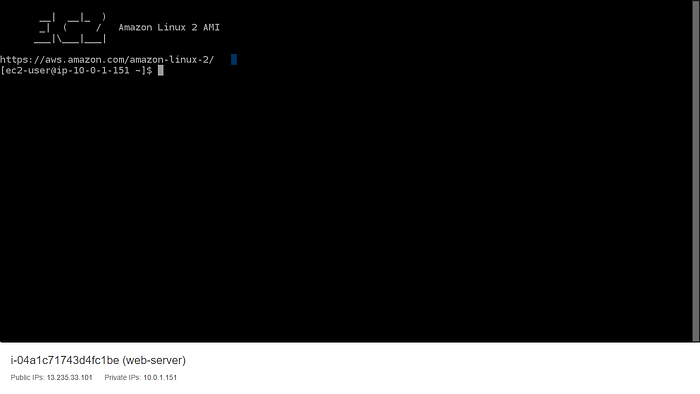
Now we need to move to root dir enter
sudo su
yum update -y
yum install httpd -y
cd /var/www/html
echo "<h1>Welcome to AWS</h1>" >index.html
systemctl start httpd
systemctl enable httpd
At the final you will see this:
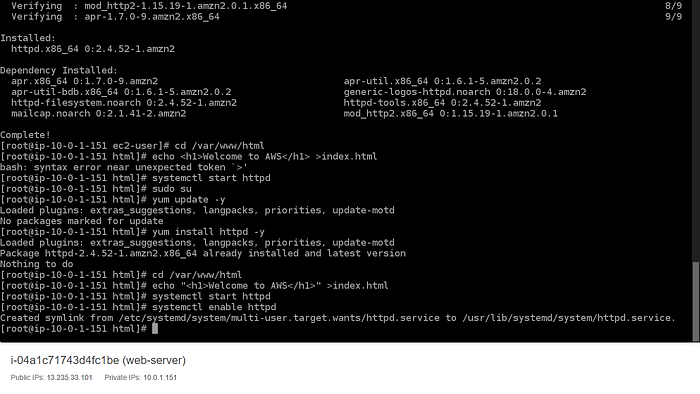
Now go to your EC2 Dashboard and select your instance now at the bottom you will see the Public IPv4 address, copy the address and open it in a new tab like:
https://xx.xxx.xxx.xxx:80You will see the sample webpage:
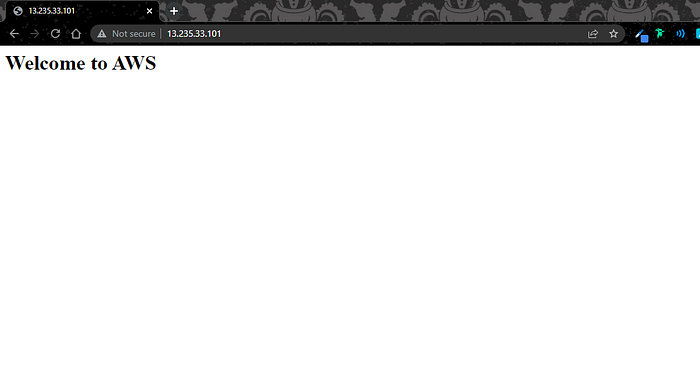

You just created your own VPC and launched a sample website.
** Note:
This is only for testing after some time you can delete your instance and your VPC, subnets, internet gateway, and route table. If you keep it active for some days it may charge you so after practicing delete your Instance.
Thanks for reading the article ❤….


